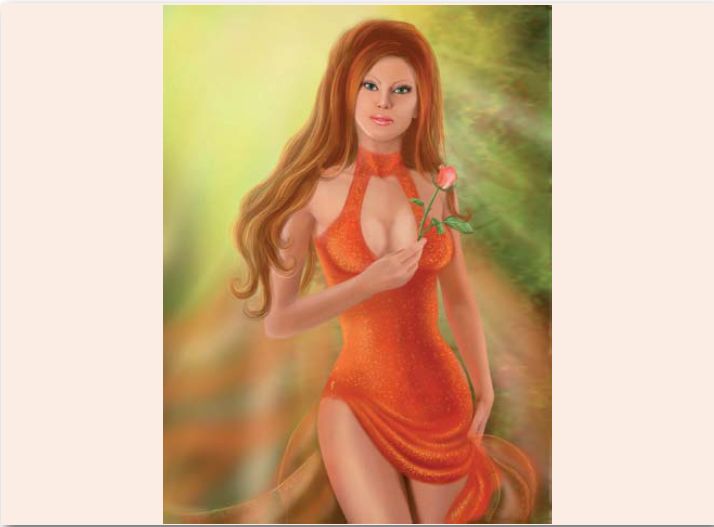
I wanted to draw a beautiful fairy with long hair and bright green
eyes, running through the forest. I decided to paint it in bright colors of
yellow and orange. The image needed to be magical.
Step 1
I made a sketch in
Photoshop using Wacom tablet. After I made a rough sketch, I decided to add
different decorative details during the process of drawing.

Step 2
I drew the basis for
the face, body and dress on a new layer. More details and highlights would be
added later.

Step 3
I started to paint
the basis for fairy's hair. I used a wide, round, soft brown brush and drew it
on a new layer. Then I began to paint more details of fairy's body and of her
dress by adding shadows and highlights.

Step 4
At this point, I
began to refi ne the face and make up, continuing from step 2, and adding more
details. I focused on the looks and the eyes because I think it’s very
important. I painted some pinkish shades on the face, added highlights, and
textured the lips. After that, I added eyelashes.

Step 5
In this step I drew
the hair. I decided that fairy's hair would be long, with a reddish-yellow hue.
First I drew the basis for hair using a dark color. Then I painted waves of the
hair lighter. I used several colors to draw the hair (brown, orange, red and
various shades of yellow), as it gives the effect of more volume. To draw the
hair I use a soft round brush. In the brush settings, I set Shape>Dynamics>Fine hair fi ne
hair and sized it to 2 px.

Step 6
I decided to make the
dress more beautiful. First, I drew bright yellow patches on the dress and the folds.
I drew highlights with a soft, round brush setting the Opacity to 40%. I then painted gloss on her dress. For this I
used a brush size of 2-5 px. Glitter (point
brush). I drew it on multiple layers with varying transparency and used a
bright yellow and red brush. The more points you paint, the more the dress will
shine! On the brightest parts of the dress I put more points of bright color.

Step 7
When I fi nished the
details on the girl's body, I drew a fl ower in her hand. On a new layer with Opacity 50%, I drew a light train. I
used a soft, round brush with Opacity set
to 30-50%.

Step 8
I started to paint
the background and used a soft, large brush. I made the left upper corner of
the background lighter and the bottom of the background - darker.

Step 9
I then painted an
abstract leaf in the right side of the background and applied the Gaussian Blur filter (Filter>Blur>Gaussian Blur).
Now, using a soft brush, with light yellow I added rays of the sun. After that
I again applied the Gaussian Blur.
Step 10
In this step I added
decorative items and ornaments. I used a brush size of 2 px and yellow and brown
colors to paint decorations (to look their best, they need to be drawn very
accurately).

Step 11
I drew the falling
leaves on 2 layers: a front and a rear layer. On the foreground, I painted the
leaves brighter. To layer the leaves in the background, I applied a Gaussian Blur.

By.Alena Lazareva
Tidak ada komentar:
Posting Komentar