Senin, 19 Maret 2012

CHANGE YOUR WINDOW VIEWS


Photoshop CS4 enables you to open and view your images in various configurations on the screen. You can open multiple similar photographs at the same time to see which one is the best of the group. You can also have two windows of the same image open. Photoshop automatically opens multiple images as separate tabs in one window. You can quickly change from one image to the next by clicking the tabs, and you can close any images you do not need by clicking X on the image tab. You can select one image and open it in a separate window while leaving all the others as tabs in the group or view all the images as cascading individual windows. You can also
tile multiple windows so they all fit on the screen at once. You can open a second window of one image and view an enlarged version in one window and the full photo in the other, so you can edit a particular area while still viewing the overall effect on the entire image. Comparing specific areas on similar photos is easy because you can match the areas displayed in each of the images and even match a zoomed-in location.

Minggu, 18 Maret 2012

CREATE A CUSTOM ACTION to increase your efficiency


Actions help you perform repeated steps quickly. An action is a series of commands that you can apply to an image with one click of the mouse. Unlike a keyboard shortcut, which can only invoke a command, an action can open a command, apply changes to an image, step through another command, apply it, and even save a file in a particular way. You can create your own actions for steps that you do over and over and add them to the Actions panel. Using the Actions panel, you record a sequence of steps and save your new action. When you need to apply the same steps to a different image, even to an entire folder of files, you play the action, and Photoshop automatically applies the steps. Actions can help you automate your work for repetitive tasks, leaving you more time to work on creative projects.

Note: As an example, the following steps show creating an action of opening a new 7- x-5- inch document at 300 pixels/inch for a greeting card. To create an action for changing an image, start by opening an image.

Rabu, 14 Maret 2012

Flying Land


Fantasy scene has always been difficult to create with great details. In this tutorial I will show you how to create a dreamy flying land scene by using various basic Photoshop techniques such as masking, color corrections, path layers. You will learn about creating some complexed and photorealistic things by combining various objects and effects.

Create a blank document and open the image entitled hill.jpg then isolate the hill part and import it to the document. Press [Ctrl] + [T] to transform layer and select Flip Horizontal then Flip Vertical to change the direction of hill, again transform layer and select Warp to adjust the shape of layer.

DARK THOUGHTS


Step 1
Choosing stock. I’ve chosen a beautiful background image and a picture of a model, both of which are perfect for a fantasy manipulation. You will also need bird brushes and hair brushes.

How to Paint a Realistic Eye


This Photoshop tutorial will explain how to paint a realistic eye in Photoshop. Eyes are by far one of the most important aspects of any painting, especially if it’s a portrait. It’s also one of the most fun features to paint, as painting an eye is much easier than one might think.

Step 1 : Sketch
Before laying down a single brushstroke, it’s important for me to create a rough sketch. It doesn’t have to be perfect, but we need to get our point across here. This will only make things easier during the painting process. Create a new layer and sketch in an eye.

Selasa, 13 Maret 2012

Photoshop Masking Advanced ( Part 5 )


Similar to the Background Eraser, is the Extract feature. It deletes information based on color and tonal values and incorporates the advanced color decontamination technology as well. For more information, see the PDF file titled Extract.

Photoshop Masking Advanced ( Part 4 )


Photoshop also offers more permanent masking tools such as the Background Eraser. Like the Eraser tool and the Magic Eraser tool, the Background Eraser deletes the unwanted information instead of merely hiding it with a mask. It’s a necessary trade off though, as the background eraser is incorporating “color decontamination” into the selection that it makes. So, not only is it choosing colors and erasing like the Magic Eraser, it is also looking at the colors in the edge pixels and removing any unwanted cast from them to avoid the halo that is common to composited images. Unfortunately this cannot be done in a channel so the changes are permanent. The background Eraser uses a brush that has a sample point in the center and an affected area that is the size of the brush.

Photoshop Masking Advanced ( Part 3 )


For hard-edged, intricate objects, the tool of choice is the Pen tool. There are basically two ways to create a path with the pen tool (the path is then later turned into a selection for masking). Clicking with the tool puts down anchor points. Clicking and dragging with the tool, draws curved lines. The curves of the lines are based on direction lines – the thinner lines that come out of the anchor point when dragging. (There is also a Freeform pen tool that can be used to draw paths and it has a magnetic option for making paths based on edge contrast.)


Photoshop Masking- Advanced ( Part 2 )


In some instances it is easier to select the background than it is the foreground object. In this example, the black background was easy to select with the Magic wand tool. Then, after selecting the background, select the opposite of the currently selected object, by choosing Select > Inverse.

This is one of those concepts in Photoshop that can take you to the next level of sophistication. Beginning people would work very hard selecting each individual leaf. Advanced users would see that the background would be MUCH easier to select, and then inverse the selection.


Photoshop Masking- Advanced ( Part 1 )


One of the most difficult tasks in Photoshop is trying to select an object and remove it from its background to create a seamless composite. This tip and technique discusses some of the many ways to accomplish this using a variety of tools, shortcuts, and workarounds. It begins with the basic selection tools and shortcuts that extend their usage and then moves more in depth working with channels, the Background Eraser, Extract, the advanced blending option and the Pen tool. In order to achieve the professional results you need, two skills must be mastered - selecting and masking. They go hand in hand, and when used together are a formidable force.


Senin, 12 Maret 2012

The following are the top 10 tips


It’s rarely easier to “fix it post” using Photoshop. If you know that you are going to photograph an object at a different angle or with different lighting, move the camera, the lights or the object in real time. This will save you countless hours of post image capture manipulation. Similarly, if you know that you are going to be removing an object from it’s background, try to shoot it against a similarly colored backdrop under similar lighting conditions. Or, if you don’t know where it’s going to be compositied, then shoot it against a solid color that is easy to drop out such as a blue screen. Try to shoot the image with low contrast you can add that in later. Don’t get lazy – Photoshop is not an excuse for bad photography.

I Fell in Love with an Alien


In this tutorial, you are going to learn how to add clouds to a photo by using layer masks, how to edit colours in Photoshop to give your image a vintage look and how to work with layering textures. This tutorial is relatively easy, but gives amazing looking results from the simplest tools.

Step 1
Open the original image with the girl holding the umbrella in Photoshop. Press [C] for the Crop Tool, and hold [Shift] down to crop the image into a square. Use the Blur tool with a brush of 70 px Diameter, 20% Hardness and 10% Strength to slightly blur down some sections of the grass.


Solitude


Creating a night scene can be a challenging task. In this tutorial I show you a few techniques that I used to make this manipulation. I will show you how to use adjustment layers and how to create light effects and shadows to achieve a more realistic look.

Creating the ambience
Download the background image from: http:// phatpuppy.deviantart.com/art/Phatpuppy-Forest-Stairs-Stock-145249785 and open it in Photoshop. You will have to make adjustments to this layer and turn it into a night scene. I suggest you use Adjustment Layers to create the night effect because they don’t damage the image. Create a Hue/Saturation adjustment layer: Layer>New Adjustment Layer>Hue/Saturation and increase Saturation to + 27. Create a Gradient Map adjustment layer and use a Black to White gradient. Set the Blend Mode of the adjustment layer to Soft Light and reduce the Opacity to 40%. Select the Gradient Tool, choose the radial type from the toolbar and use the Black to Transparent preset. Draw the gradient from the middle of the image outwards. The Blend Mode should be Normal but you can experiment with Soft Light. Duplicate the layer if you want to get a darker effect. Your objective is to darken the image using the gradient but leave the stairs visible.


Selective coloring in Photoshop


Sometimes you might want to set apart an object in an image that might not stand out by itself. This tip demonstrates the most flexible way to convert part of an image to grayscale while allowing selective areas in the image remain in color.

Open the image.
Select File > Open and open the RGB file. In the Channels palette, click on the individual channels to view them. ( Notice that the green channel typically holds most of the detail in an image ). When finished viewing the channels, click the RGB composite channel and make sure that all of the channels are visible. Note: knowing what channel holds the most detail helps make the best conversion from color to grayscale in the next step.


Making the mood


A photographer’s main goal is to take a photo that makes the viewer feel a strong emotion towards it, whether it is love, hate, anger or passion. But when a photo is excellently taken, yet the colors, lighting, and texture, don't match up to the photoer's vision, a photo will become uninspiring. This tutorial will teach you how to take your photo to the next level and create an image that matches your vision.

Step 1
The fi rst step in changing a photo is doing the basics. You have to prepare your photo before you can move to the fun stuff. In this pickture, I got rid of any noticeable blemishes the model had, and g of noticeable hair that were going across her face to give more clear picture of the model. I did this using the Patch and Clone Stamp tool. When editing a model, make sure to always keep texture in the skin, it's more interesting that way as opposed to having a model's face which is completely airbrushed.


Advanced Layers


As we discovered in Layer Basics, the key to keeping your editing flexible while easily combining images together is through layer masks. Let’s take a moment and review how masking works in Photoshop as it will apply to more complex features through out this tip and technique. The only rule to remember is that painting with black in a mask will hide whatever is on the layer, revealing the layers below. Painting with white will reveal the information on the layer, hiding the layers below. In this image, there are two layers, the ocean (which is the Background) and the “cracked earth”. We’ll add a Layer Mask to composite them together. With the “cracked earth” layer targeted in the Layers palette, select Layer > Add Layer Mask > Reveal All.


Forest Fairy


I wanted to draw a beautiful fairy with long hair and bright green eyes, running through the forest. I decided to paint it in bright colors of yellow and orange. The image needed to be magical.

Step 1
I made a sketch in Photoshop using Wacom tablet. After I made a rough sketch, I decided to add different decorative details during the process of drawing.


Distractions


In this tutorial I will show you how to acheive an interesting effect using vectors.

Step 1
To begin, create a new document as shown below.

Step 2
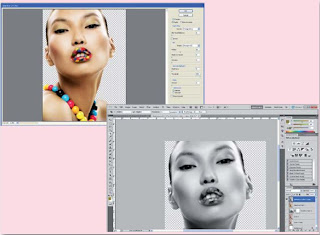
Fill the background layer with black color: [Alt] + [Backspace]. Next select the picture for this tutorial. Any picture will do, but the photo of a face or a portrait will be the most suitable here. Now you need to cut the face out of the picture. In this scenario we used Pen Tool since it provided the best result. In Paths panel click left mouse button on the thumbnail you created. Next press [Ctrl] +[C] to copy and [Ctrl]+[V] to paste it.


Step 3
Now we will adjust contrast of the cut out image. Go to Layer>New Adjustments Layer>Selective color and set the values as you see in the picture below.


Step 4
Duplicate the model's layer and desaturate it using [Shift]+[Ctrl]+[U]. In the Layers panel select desaturated copy of the model and go to Filter>Blur>Lens Blur and use the settings below


Step 5
Now we need to save the document as PSD file (File>Save as).


Step 6
In this step you need to make sure that you have chosen or made the right vectors to be used in the image you are creating. As soon as you have it done, drag into Photoshop and choose Smart object. To do that, highlight your Vector in Layers panel, right click mouse button and from the drop down menu select Convert to smart object.


Step 7
Now put your vectors in your file. Choose the first one and go to Filter>Distort>Displace. Use the settings shown below. You have to do it for all the vector layers. Choose the fi le you saved before in PSD format to complete the displace filter. Next, duplicate the face image as many times as the number of vectors you add to your file. We need the original copy of the image you cut on top of any smart object you create. Once you have the images on top of the vector layers you have to create Clipping masks. Right-click on each copy of the image layer in the Layers palette and select Create Clipping Mask.


Step 8
Once you have done all the clipping masks, you must give some layer properties to the vector layers. Click on fx below the Layers panel, select drop shadow and use the settings below.


Step 9
You can modify the settings of each smart object layer just the way you want. I hope you enjoy it.


by José-Paulo Reis