This tutorial shows how to improve your photos with a minimal amount of work, especially if you’re working with big batches or for presentations where finals are to be selected.
Step 1
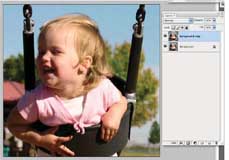
Open image and convert to CMYK : [Image] [Mode] [CMYK]. Drag the picture to a new layer. Now you have a copy that won’t be touched. We’ll clean and sharpen on background layer.

Step 2
[Filter] [Sharpen] [Unsharp Masking]. Amounts according to need.

Step 3
Clean up dirt, blemishes, etc. Zoom to at least 300% and use a grid [View] [Show] [Grid] if the shot is large to be sure no areas are left out. Change grid size and color under [Edit] [Preferences] [Guides Grids Slices].


Step 4
A simple curves move [Layer] [New adjustment layer] [Curves] will improve the contrast.

Step 5
This photo is a little red and needs color correction especially the skin tones. [Layer] [New adjustment layer] [Selective color]. Choose Red then adjust the Magenta in the Red. I also adjusted the Cyan and Black in the blue sky. To finish up I erased some of the mask from the selective color around the red tile roof in the background and her hair. Now our photo is ready to view.
Tidak ada komentar:
Posting Komentar