
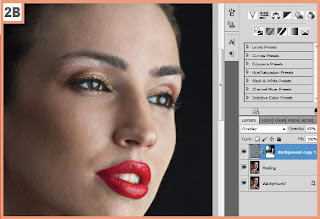
Step 1
 Open the
picture, duplicate background layer and rename it in Healing. Select from the tools panel the Healing brush tool and remove all the imperfections of the skin
as spots, pimples or little wrinkles. Then select the Clone stamp tool and with a size of 30 px, define the lip
contour, cloning parts of lips with a single, continuous movement.
Open the
picture, duplicate background layer and rename it in Healing. Select from the tools panel the Healing brush tool and remove all the imperfections of the skin
as spots, pimples or little wrinkles. Then select the Clone stamp tool and with a size of 30 px, define the lip
contour, cloning parts of lips with a single, continuous movement.
Step 2
 Now
duplicate the Healing layer and
call it High pass. Go in [ Filter ] [ Other
] [ High pass ] and set the
radius on 10,0 px. Press OK. Set the blending mode of the
layer to Overlay and add a
layer mask filled with black to this layer menu [ Layer ] [ Add
layer mask ] [ Hide all ].
Using a white brush with a size of about 300 px, paint in the blurry zone and
the parts of the face that you want make more defined. Then reduce the layer’s Opacity ( to 60% for example ) to
soften the image and give it a natural aspect.
Now
duplicate the Healing layer and
call it High pass. Go in [ Filter ] [ Other
] [ High pass ] and set the
radius on 10,0 px. Press OK. Set the blending mode of the
layer to Overlay and add a
layer mask filled with black to this layer menu [ Layer ] [ Add
layer mask ] [ Hide all ].
Using a white brush with a size of about 300 px, paint in the blurry zone and
the parts of the face that you want make more defined. Then reduce the layer’s Opacity ( to 60% for example ) to
soften the image and give it a natural aspect.
Step 3
Now create a new group and call it Skin. Create a stamp of the layers shortcut [ Alt ]+[ Ctrl ]+[ Shift ]+[ E ], duplicate this layer and move the two layers into the group skin. Rename the layer below Blur and the layer above High pass. In the layer High pass, apply the High pass filter with a radius of 5 px and press OK. Set the blending mode of this layer to Soft light and go to [ Layer ] [ Layer mask ] [ Hide all ]. Now paint with a soft white brush only on the skin. Select Blur layer and go to [ Filter ] [ Blur ] [ Gaussian blur ] and set the radius to 60 px; press OK. Now apply a layer mask as we did in the High pass layer, and paint the skin again (with white). Lower the Opacity of this layer to about 55 %, to obtain a natural result.

Step 4
Now the
finishing regulations. Create a new group and call it Adjustments. Create a new Selective
color layer adjustment [ Layer ] [ New adjustment layer ]
[ Selective color
] and set these values Colors Red : Cyan + 28 % ; Magenta + 7 %
; Yellow + 4 %; Create a
new curves layer [ Layer ] [ New
adjustment layer ] [Curves ] and
create a curve like this to illuminate the picture. Finaly, create a new levels
adjustment layer [ Layer ] [ New
adjustment layer ] [ Levels ], from the dropdown menu select increase contrast 1 and you should
obtain the final result.


Tidak ada komentar:
Posting Komentar